Posted in Believe it or not!, Blessings of Habit, Health, Homemaking, Photos

Germ Warfare – 3 Plus Recipes!

preparing to blanch
Preparing to Blanch Beet Greens

A friend and I were discussing blanching before freezing when she asked, “Do you have to?”

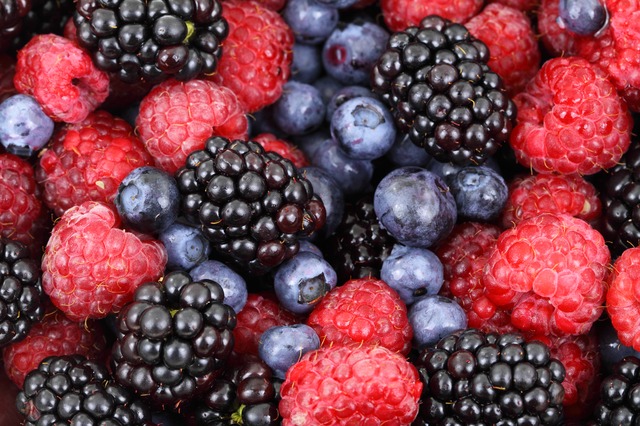
In an emergency, many foods you ordinarily would first prepare, you may freeze raw and untreated. Don’t expect them, though, to last over three months because blanching destroys the enzymes that induce ripening. Some vegetables, when not blanched, will continue maturing, though frozen. Unblanched okra, for instance, will become woody over time, in the freezer. So use these foods quickly. The foods must be perfect and unwashed. Freeze soft things before wrapping for protection from freezer flavors.

One friend only shells (does not wash) her surplus field peas and freezes them in one huge plastic bag. They separate easily. She measures, washes, and cooks as usual. She says they taste exactly the same but she does use the unblanched ones first.

I have found that you may treat the following produce this way if it has not been washed: whole tomatoes, whole apples, whole plums, whole carrots, whole peppers, edible pod peas, shelled field peas, and whole okra. All are for cooking only, except plums make good frozen treats. Be sure you remember you haven’t washed them before you use them.

The reasoning behind not washing vegetable before freezing is that they have a natural protective coating that helps ward off drying and if you freeze them wet, they will be impossible to separate for individual use. In the case of beans, this is not a factor, if you will immerse the entire package in warm water to rinse, later. Just think. If it is waxy, don’t wash it. If you want to freeze individually and bag later, it’s okay. Do not freeze anything with bad spots. How will you remove them once frozen? Just think. More info, starting here.

Two foods that you should always blanch and freeze are corn and greens. These two also taste pretty bad when canned, and take a lot of time and heat. One food that even the freezer books say we should not freeze is potatoes. I do not know why, because I have never tried it. I know, frozen potatoes are available in stores, but do they taste good? I’ve never tried them, either! Potatoes are best stored raw or canned.

To clean your kitchen after canning, just roll up the towels you used for covering surfaces, throw them into the washer and wipe the counter tops. You’re done! Then when canned foods are completely cool, remove bands and run the filled jars through the rinse cycle of your dishwasher. This removes the sticky film, from juices leaked in pressure cooking, which molds in the cabinets. These molds can enter the jar when you open it. They also make bad odors in your food storage area and attract bugs.

Now, DRUMROLL PLEASE, the real reason you read this far — The Recipes!

The following recipes come from several requests for instructions for making various sauces to use up excess tomatoes, etc. Also there are a few recipes for foods mentioned this week. Hope you enjoy making, storing, serving, and eating them as much as we do!

Homemade Mustard

1 3/4 c. white vinegar
2 onions chopped fine
1/2 c. mustard seeds
1/4 t. white pepper
2 t. soy sauce
2 T. white sugar
1 t. turmeric

Puree all ingredients in blender. Bring to a boil over low heat in a heavy pan, stirring continuously with a wire whip. Stir and simmer for 5 minutes. Seal in hot jars with hot lids. Place in boiling water bath for 5 minutes. Keeps very well.  Yield:  about one pint.

Homemade Catsup (not store bought!)

10 lb. ripe tomatoes
3 onions
2 bell peppers, red or green
1 clove garlic
3/4 c. brown sugar or honey
2” stick cinnamon
1 t. peppercorns
1 t. whole cloves
1 t. allspice berries
1 t. celery seed
1 c. cider vinegar
1 T. salt (opt.)
2 t. paprika
1/4 t. cayenne

Puree vegetables in blender, OR:  chop, cook, and sieve them.  Bring  to a simmer.  Put whole spices into a bag and add all other ingredients.  Cook very slowly until very thick.  Remove the bag.  Seal in hot jars with hot lids.  Hot water bath for 15 minutes.  Yield:  2 – 3 pints.  This is a good recipe for the crock pot, if you keep adding the juice until all is cooked down.  It is too big for a crock pot at first, but becomes of manageable size eventually.  The actual cooking takes all day on the stove top.

Tomatilla Salsa (A great use for small green tomatoes from dying vines)

5 1/2 c. chopped tomatillas OR green tomatoes
1 c. chopped onion
1 c. chopped jalapenos
(wear gloves and use ventilation!)
4 cloves garlic, minced
2 T. minced cilantro (opt.)
2 t. cumin
1/2 t. salt
1/2 t. cayenne
1/4 c. lime juice OR 1 g vitamin C tablet

Bring all to a boil in a large pot.  Simmer 10 minutes.  Seal in hot jars with hot lids.  Place in boiling water bath for 15 minutes.  Yield:  about 2 pints.  I cannot over-emphasize the importance of being careful with fresh hot peppers! I have made this using a food grinder, too, and it is much easier on the hands and lungs. You can grind the whole cayennes if you like, and have interesting red flecks in this lovely green condiment. The flavor when raw is sublime, but HOT. After cooking, the natural burning flavors of onion and garlic will have sweetened, though, so do not be alarmed at the raw flavor — just enjoy.

Pico de Gallo Sauce

1 chopped onion
2 chopped jalapenos
3 chopped tomatoes
salt to taste
2 branches chopped cilantro (leaves)

Mix.  Refrigerate for 2 hours.  Serve with chips.  OR:  Boil for 20 minutes, seal in hot jars with hot lids, and place into boiling water bath for 15 minutes.  Yield:  about 1 pint.

Pear Preserves

8 c. pears, peeled and chopped
2 c. brown sugar or honey
2 T. butter

Stir pears and sugar over medium heat until greatly reduced and thickened (2 to 4 hours).  Add butter and serve over ice cream.  OR:  Omit butter and seal in hot jars with hot lids.  Place in boiling water bath for 15 minutes.  Yield:  about 2 pints.  This is another good one for the crock pot.

Very Quick Blackberry Sauce

1 pint frozen blackberries
1 c. sugar
1 c. water
2 T. cornstarch

Place 1/2 c. of the blackberries with other ingredients into small saucepan.  Stir and bring to slow boil, mashing berries to color the sauce.  Simmer until very thick.  Add rest of frozen berries.  Sauce will set very quickly and be cool enough to use immediately, with all berries instantly thawed.  Delicious on cheesecake or pound cake.  This recipe will only work with berries that have been frozen raw and are fairly easy to separate.  Makes about 2 cups.  Serves about nine.  Also, try using 3 T. cornstarch to make a topping for a pie.

Potato Pancakes

1 qt. canned potatoes
1 egg
1/4 c. corn meal
1/4 c. self-rising flour
1/2 chopped onion (opt.)
salt and pepper to taste
oil

Grate potatoes including skins into bowl.  Add rest of ingredients.  Stir well.  Fry in 1/2” medium-hot oil until well-browned and firm in middle, turning once.  Drain on paper towel.  Serve hot with honey, if desired.  Serves about six.

Never Fail Meringue

1 T. cornstarch
2 T. sugar
1/2 c. water
3 egg whites
6 T. sugar
1/8 t. salt
1/2 t vanilla

This is a little tricky to time perfectly, but worth it to me.  Cook cornstarch, 2 T. sugar, and water over medium heat, stirring, until thick and clear.  At the same time, beat egg whites until soft peaks form.  Add 6 T. sugar, salt, and vanilla, gradually.  Beat until stiff.  Continue beating while slowly adding hot cornstarch mixture.  Beat until stiff.  Apply to pie that has hot filling.  Bake at 350 degrees for 15 – 20 minutes.   I like this one because I don’t feel so much as if I’m eating raw egg.

Posted in Believe it or not!, Blessings of Habit, Health, Homemaking

Germ Warfare – 2

Cleaning the Food

Carrots of many colors.

Let’s start with root crops.

Ladies, if there is the least, remotest possibility that your potatoes, carrots, beets, etc., were grown in soil fertilized with commercial chicken manure, you really ought to hire the soil tested. The reason is that commercially grown chickens were, in the past, fed arsenic. It is harmless to them, even increases production, passing through the chicken, remaining in the droppings a long time, contaminating the soil.

It is fatally poison to humans. Cows have died from eating grass with arsenic laden soil clinging to it.

“They say” arsenic does not enter the plant, but it is imperative to remove ALL the dirt.

However, root crops will fail in raw storage, if you scrub them all nice and clean. So, do you bring arsenic into your root cellar? Do you scrub and can those veggies? You have to decide. Ask your County Extension Agent for free tests and pamphlets and the latest advice on these matters.

If your soil is O.K., you can do what I love doing—put the perfect potatoes and carrots, unwashed, into root storage and can the strange ones (the two-legged carrots and the potatoes with noses). Then as winter progresses and the cellar storage begins to dysfunction, can the things that are still good enough. You don’t lose as much in root storage, that way, but also don’t waste effort on unnecessary canning.

To can potatoes and carrots, most books tell us to peel them first. I just scrub my own home-grown veggies, because I like to eat the peel and it has many of the vitamins. First use a hose on them outdoors, to get most of the dirt. A patio or sidewalk is good for this. Then use a brush and clean water.

A friend of mine makes a few jars of diced potatoes all ready for quick potato salad or stew. I like mine as whole as possible for grating into potato patties. Canned carrots are best sliced, though I put up a few pints of tiny ones (fingerlings) whole. These I use for gifts or special company.

Wash ALL washable food before using. Think about using a little soap, too. Unscented home-style bar soap cleans apples, celery, potatoes, etc., just fine.

If this idea amazes you, think: who picked, wrapped, boxed, unboxed, unwrapped, and displayed your apple? You don’t know! Did any of these six people have a cold or the flu? Probably! Does the grocery store or produce truck have roaches? Of course!

Ant-climbing-on-apple-flowers__41042
Ant-climbing-on-apple-flowers__41042 (Photo credit: Public Domain Photos)

Even if you grew the fruit yourself, never sprayed it, and picked it yourself, you can be pretty sure that your tree has ants, roaches, and at least two types of flies. They can spread disease; it’s a fact.

One favorite way to store many fruits is in jams. Apples and pears go into applesauce and pear sauce, which we use like jam, too. (Make pear sauce just like applesauce.) We can a few peaches and pears. Try pears with a 1/4” piece of ginger root in the jar. Pear preserves are a real treat over vanilla ice cream.

Also, freeze a few bags of slightly sugared, sliced peaches and use them for blender ice cream or shakes, which are easy to make with chilled milk and frozen fruit.

I freeze blackberries whole. Just wash, drain, and package.

When you wash small produce, such as peas or snapped beans, use two sinks. Scour sinks clean and fill with water. Add produce to one sink. Stir gently with your hands and then transfer from that sink to the other. Drain and refill first sink while stirring the other. Continue until used water is clear.

While you are transferring, try this method for estimating the jars you’ll need: pick up as much as you are able in a double handful;  count it as about one pint.

Before I forget:

  • Wash greens in the automatic washing machine.
  • Use Vitamin C for fruit preserver. (One 500 mg tablet per gallon of water.)

Tomorrow: Special blanching tips and RECIPES

____________________

Photo credit: wikipedia

Enhanced by Zemanta
Posted in Believe it or not!, Blessings of Habit, Health, Homemaking

Germ Warfare – 1

Lemon Meringue Pie
Lemon Meringue Pie

She was holding back tears of frustration. It had failed, again.

Every time she’d tried to duplicate her mother’s lemon pie, all she could produce was lemon soup.

She had asked her mother.

The many possible explanations made her head swim.

Were the eggs too small, too old, or too cold?

Was the cornstarch under-ripe, or were the lemons over-ripe?

Was the water filtered? The sugar sifted?

How many times she’d watched Mother make that pie! She mentally ticked off the ingredients, desperate for a clue . . . .

She forgot one ingredient.

No, she did not omit anything on the recipe card. Actually, she forgot to examine carefully one item that she always, unthinkingly, added to her mother’s formula.

Human saliva.

Yes, in her youthful ignorance of scrupulous hygiene, she always sampled the pie filling with the same spoon, several times. Her family often shared apples, ice cream cones, and drinking glasses, she reasoned. No one would care, or even know.

M-m-m! So delicious! Sure hope it sets up this time…

If you have ever fed a child from a jar of baby food and refrigerated the left-overs for later, you may have had the same experience of soupy consistency. The food isn’t exactly spoiled—just somewhat digested. God created the enzymes in saliva expressly for that purpose and they work very well.

Cleanliness in the kitchen is of crucial importance. The lack of it is considered rudeness.  In this country, a guest has a right to decline to eat where food is not protected from contaminants. You wouldn’t expect a person to eat a helping of casserole with a fly on it, right?

That’s because of the germs.

The battle against germs must be fought on all fronts, though. The ice-cube that hits the floor, the meat juice on the cutting board, the dust in the vent hood, the film on the refrigerator handle, and the licked spoon are some of the prime targets in this battle.

And if you think your hands are pretty clean, I challenge you to try this for one day: rinse them a little and then dry on the same white towel each time you begin to work in the kitchen.

The importance of cleanliness skyrockets, though, with the added factor of food storage. I mean, why bother to preserve dirty food? It is especially important to realize the part that germs, enzymes, etc., can play in the failures experienced in dry storage and raw storage. Uncooked food stuff can save your life or kill you, depending on its quality.

Generally, home dried food that is quick-dried and then stored frozen is safe. Some of it is delicious. Peaches are superb. If you dry food out-doors, though, do use netting to protect it from insects and do not choose a day when dust is blowing everywhere. If you use a mechanical dehydrator, clean it between uses. Check it for six-legged occupants.  In fact, if you know that your house is not bug-free, you should clean every utensil you need for each meal.

When you prepare foods for storage, clean your kitchen counters and tables first. Use an ammonia based spray, dish water, baking soda, or vinegar. Any of the extreme acid or alkaline substances usually does a good job of killing and removing bacteria, etc. Then spread clean towels over the work surfaces you plan to use. I use towels from garage sales and bleach them often.

Next wash the utensils. The colander is dusty, the tongs are rusty, and the cutting board is musty!

I hope you have a wooden cutting board because they are the most sanitary.

Wash the jars, carefully. Hold them up to a light to check for little bits of last year’s food. Wash the bands and flats. (Especially the flats, because they have direct contact with the food, just like the jars. They can have metal filings, stray bits of rubber, mildew and roach hairs on them. Ick.)

Tomorrow, the food.

__________________

Photo credit: David Maddison

Posted in Believe it or not!, Homemaking, Photos, Scripture, Womanhood

FIRE!

Glen Eyrie castle in Colorado Springs

Friends, we may think we have troubles.

But not like Colorado Springs, right now.

For an eye-witness report, from a sweet blogging lady, go here.

She speaks of her love for her friends and neighbors.

She is doing her best to help them.

Because she can. Because she is home.

She also says, on a subsequent post:

For once, I don’t feel much like I need to add anything to this glorious reassurance. Maybe I will sometime, but not this morning. This morning, this is my prayer – over my city, my life, and the lives of my loved ones.

“But as for me, I will always have hope; I will praise you more and more. My mouth will tell of your righteousness, of your salvation all day long, though I know not its measure.

I will come and proclaim your mighty acts, O Sovereign LORD; I will proclaim your righteousness, yours alone. Since my youth, O God, you have taught me, and to this day I declare your marvelous deeds. Even when I am old and gray, do not forsake me, O God, till I declare your power to the next generation, your might to all who are to come.

Your righteousness reaches to the skies, O God, you who have done great things.

Who, O God, is like you?

Though you have made me see troubles, many and bitter, you will restore my life again; from the depths of the earth you will again bring me up. You will increase my honor and comfort me once again.”

~Psalm 71:14-21 (NIV)

_______________________

Photo credit: David Shankbone

Posted in Blessings of Habit, Good ol' days, Health, Homemaking, Inspiring, Photos

I Like Pickles!

It was February, 15 years ago, when I began to write this, a cold misty day – my favorite weather, but I was ignoring it. My heart had attached itself to a small, glossy package of seeds entitled “Little Marvel Pea.”

Oh, how we love these, the best food every created! Each year my children searched store aisles with eager-eagle eyes and then the begging would begin and it would not end until I bought at least two packages.

That had happened in January and the seeds had sat on the table by my back door for over a month, proclaiming marvelousness each time I passed.

They are marvels because they have taught my children to love digging, planting, weeding, and sweating. Sowing and Reaping, the Parable of the Sower, and endless other lessons have been planted in young hearts because they will do anything for “Little Marvels”, briefly simmered and buttered, the earlier in the year, the better.

I’m so glad for what God can do through the simplicity of humbly acquiring real food for our tables.

I’ve been discussing pickles, though, with my friends, lately. Someone asked, “How do you make little, sweet, whole “Gherkin” pickles? My kids love them . . . ” There is such potential for blessing here.

Mom, teach those little ones also to love the simple act of acquiring them!

The answer is that first you buy cucumber seed. You will never find the right cucumbers at a farmer’s market. For the very small pickles you will need many more plants than usual because each plant sets only a few flowers a day. To get enough tiny cucumbers to bother with would take many days and the first-picked ones would wilt . . . so you need enough to be able to pick around 2 quarts at a time.

To accomplish this, plant about 25 seeds.

Now your neighbors will tell you that is too many, but they will really react when they see your whole cucumber patch in one neat row with no weeds.

Yes, plant those seeds in a row, about five inches between plants. Yes, ten to twelve feet of row would be just right. (Forget the neighbors!)

After they sprout, it is time to “subdue” them. Train each vine to follow the line of the row in which it is growing. At the far end, there will be vines trailing where none were planted, so plan a space for that. The concentration of leaves will shade out nearly all weeds and keep the soil moister and cooler. Also, the row scheme lets you walk, weed, hoe, till and harvest with ease.

Once the plants are in full production, pick them every morning. They’ll not be as uniform in size as “store bought” but will cost less. You may save them in an airtight container, refrigerated for a day, but not much longer. This will help you work around your busy summer schedule and provide for a bigger batch to work with each time you heat up your kitchen.

Recipes tomorrow.

Posted in Homemaking, Inspiring, Photos, Recipes

Love Frozen Over!

Save the berries!
Save the berries!

Here’s the inside scoop on really neat tricks to make you fall in love with your freezer even more:

  • When you harvest elderberries, pick the whole stem, freeze the whole stem inside a plastic bag, and remove the berries frozen. You get more juice into your recipe and less running down your elbows.
  • If you have a problem with fruit not ripening all at once, freeze the early pieces and combine them with the later harvest for your larger recipes.
  • Save juice for jellies, frozen in recipe size batches, in freezer safe cartons, until sugar is on sale. Allow 24 hours for a gallon to thaw at room temp.
  • Start a sourdough bread business, offering a discount on frozen surplus.
  • Make your own brown and serve rolls out of any favorite bread recipe by baking the rolls at 275 degrees for 40 minutes, instead of the usual directions. Cool, bag, and freeze. Or if they are individual rolls, freeze on a tray, first, then bag. Then use as needed, right from the frozen state, baking on a cookie sheet at 400 degrees for about 10 minutes.
  • Rescue cheese by grating and freezing it. Use frozen grated cheese straight from the freezer in recipes.
  • Freeze milk while on vacation. Leave 2 inches for expansion.

Okay. You know you’re here for the RECIPES!

That Exquisite Dish

1 chicken, cleaned and skinned
2 qt. Pure water
½ c. fresh sage leaves
¼ c. fresh lemon basil leaves
2 stalks celery, chunked
1 onion, chopped, divided
1 T. salt
1 cayenne pepper
2 c. brown rice
½ stick butter
½ c. whole wheat flour
salt  to taste
8 oz. mild cheddar cheese, grated
1 pt. “rotel”, mashed in juice

Simmer chicken in 2 qt. water, sage, basil, celery, ½ onion, 1 T. salt, and cayenne, until meat separates from bone. Drain, reserving broth. Refrigerate broth until fat congeals. Remove fat. De-bone chicken. Chop meat slightly, to make bite-sized pieces. Chop cooked seasoning vegetables finely.  Mix with meat. Do not mix meat until it disintegrates – just stir some.

Bring one qt. broth and rice to boil. Cover and simmer until tender.

Cook remaining onion over medium heat, in butter, until clear. Remove from heat. Add flour and stir. Mix in carefully over medium heat with wire whip, enough broth to make medium thick sauce. Add water if necessary, salt to taste.

Layer in 9×13 glass casserole as follows:
rice
chicken
sauce
cheese
Repeat.

Pour jar of mashed Rotel over all. Bake at 350 degrees until lightly browned and bubbly. Or cover tightly and freeze no more than 3 months. Uncover, place in 350 degree oven, bake until brown and bubbly, about 45 minutes.

Serves 12.

Watermelon Ice

½ leftover watermelon
1 lemon
honey
other fruit (opt.)
milk or condensed milk (opt.)

Remove seed from melon. Puree fruit in blender. Add other pureed fruits or milk if desired. Add juice of lemon. Add honey to taste. Freeze in shallow glass pan or bowl. Stir twice while freezing. Or try freezing in sealable bag, kept upright in freezer, and mashing instead of stirring. Serve as sherbet.

Frozen Dampened Laundry

1 bu. assorted shirts
1 c. powdered soap
2 tubs water, divided
1 unpredictable day
1 unbelievable week

Mix shirts, soap, and 1 tub water. Heat and stir well. Drain. Place shirts in second tub water. Stir well. Drain. Hang shirts to dry outdoors in sun. After 5 hours, condensation will form and fall from a small cloud immediately above shirts. Remove laundry when only slightly damp. Fold and roll as for French pastry, bag, and freeze. Keeps indefinitely. Calories: minus 560.

Posted in Blessings of Habit, Homemaking, Photos, Wisdom

Don’t Abuse Your Freezer!

Iced freezer, defrosting
Iced freezer

Any decent tool deserves to enjoy decent upkeep and your freezer is no exception. There is a right way to take good care of it and make it last longer.

First, you should defrost it once a year. It eventually will not work right if you do not. Even the frost-free types need an annual warming, rinsing, and drying, to get ice out of the insulation and remove frozen spills from the interior.

To defrost a deep freeze, you may want to choose a time when it is closer to empty, such as very early spring, but it does not really matter when.

Here is the procedure:

  1. Take out all the contents. Place on a table or counter the things that are okay to thaw, such as bread, flour, etc.
  2. Put everything else into a good thaw-proof place. The little freezer in your refrigerator is good. Your neighbor’s deep freeze is also good. You could use a large cooler. But if these options are not available, try this: Put all the frozen food into a laundry basket which is inside a couple of sleeping bags. No kidding, it keeps. Our family has moved frozen food that way on trips that take 10 hours. Sugared fruit might soften some, but it does that even in the freezer, sometimes.
  3. As the freezer thaws, the lid or door should be open.
  4. Please resist the temptation to chop or pry at clumps of frost.
  5. A fan blowing toward the inside of it will greatly speed thawing.
  6. The lid or door will likely be drippy, so be ready with several old towels. Better yet, take it outdoors to sit in the sun. When empty, it is not very heavy, just awkward. You’ll need help, but I have moved mine using the help of only three older children.
  7. Once the dripping stops, the freezer is probably finished thawing. Bail out any standing water. Wipe the whole freezer, inside and out, with mild soap or baking soda water. Wipe completely dry.
  8. Check for rust, inside and out, and very carefully remove rust with steel wool. Cover these spots with clear or white nail polish, or with car paint.
  9. If the box seams are caulked, check for gaps and re-caulk, if needed, with a product suitable for freezing temperatures.

Now you are ready to plug it back in and let it freeze. Once cools, reload it.

Doesn’t it hum differently, now, as if it is happier?

Another freezer care-taking chore is to keep it dusted. Wipe the exterior at least monthly, including the sides. You should also wipe off exterior dampness during humid weather. Try to keep the dust from under it, as well.

One important fact that few people know: The deep freeze resents having items sitting on it, especially insulating things such as a pretty quilt or a pile of laundry. I am not sure why, but I have heard it traps warmth near the top of the box instead of letting it escape. I suppose this means the 25 degree “warmth” cannot escape from the 18 degree box, or something. I do know placing such things on my freezer causes moisture to form on it every time.

Last, but not least, I have prepared a short list of tricks and recipes for tomorrow. See ya!

________________________

photo credit: Wikipedia